|
Table of Contents : |
| 1. | Login to your account using the username and password provided. | |
| 2. | Hover over the Fleet Management tab and Click on APU Centre Tab. |  |
| 3. | Select any row from grid. The row will become highlighted once selected. |  |
| 4. | Hover over Current Status drop down. |  |
| 5. | Click on the APU Delivery Bible/APU Delivery Binder/APU Records Library/APU Tech Link. It will open a new window. |     |
| 6. | Click on the ADD button. It will open a new window. |  |
| 7. | We can Add Multiple Rows by insert the number of rows here and Enter for set number of rows you want. |  |
| 8. | Fill the Information that you want. | 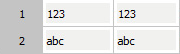 |
| 9. | Click on SAVE Button to add new rows created by you. |  |
| 10. | It will show a popup. Click on OK button. | 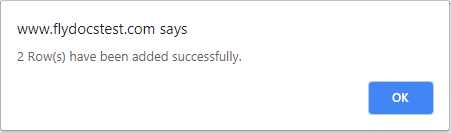 |
How do I add a rows above or below?
| 1. | Login to your account using the username and password provided. | |
| 2. | Hover over the Fleet Management tab and Click on APU Centre Tab. | |
| 3. | Select any row from grid. The row will become highlighted once selected. | |
| 4. | Hover over Current Status drop down. | |
| 5. | Click on the APU Delivery Bible/APU Delivery Binder/APU Records Library/APU Tech Link. It will open a new window. | |
| 6. | For creating new row, Right click on the row where you want to add new rows above or below. |  |
| 7. | We can Add Multiple Rows by insert the number of rows here and Enter for set number of rows you want. | |
| 8. | Fill the Information that you want. | |
| 9. | Click on SAVE Button to add new rows. | |
| 10. | It will show a popup. Click on OK button. | |
How do I convert a normal row to a header row?
| 1. | Login to your account using the username and password provided. | |
| 2. | Hover over the Fleet Management tab and Click on APU Centre Tab. | |
| 3. | Select any row from grid. The row will become highlighted once selected. | |
| 4. | Hover over Current Status drop down. | |
| 5. | Click on the APU Delivery Bible/APU Delivery Binder/APU Records Library/APU Tech Link. It will open a new window. | |
| 6. | Right click on the Row you wish to Convert to a Header Row and Click on the Convert to Header Row button. |  |
How do I convert a header row in to a normal row?
| 1. | Login to your account using the username and password provided. | |
| 2. | Hover over the Fleet Management tab and Click on APU Centre Tab. | |
| 3. | Select any row from grid. The row will become highlighted once selected. | |
| 4. | Hover over Current Status drop down. | |
| 5. | Click on the APU Delivery Bible/APU Delivery Binder/APU Records Library/APU Tech Link. It will open a new window. | |
| 6. | Right click on the Header Row that you wish to Convert to a Standard Row and Click on the Convert to Standard Row button. | 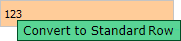 |
How do I Hyperlink a row to CS in Delivery Bible?
| 1. | Login to your account using the username and password provided. | |
| 2. | Hover over the Fleet Management tab and Click on APU Centre Tab. | |
| 3. | Select any row from grid. The row will become highlighted once selected. | |
| 4. | Hover over Current Status drop down. | |
| 5. | Click on the APU Delivery Bible/APU Delivery Binder/APU Records Library/APU Tech Link. It will open a new window. | |
| 6. | Right Click on the row for which you wish to Manage the Hyperlink option. It will open new window. |  |
| 7. | Select Hyperlink option to Yes and Set Path for Hyperlink by selecting values from lists. | 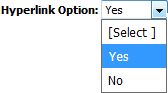 |
| 8. | Select Current Status option from List. | 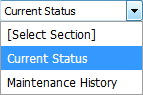 |
| 9. | Select Tab from list and Other relevant details. | 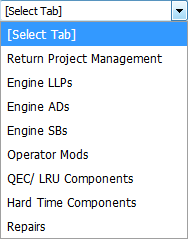 |
| 10. | Click on SAVE button. |  |
How do I make a row read only in Delivery Bible?
| 1. | Login to your account using the username and password provided. | |
| 2. | Hover over the Fleet Management tab and Click on APU Centre Tab. | |
| 3. | Select any row from grid. The row will become highlighted once selected. | |
| 4. | Hover over Current Status drop down. | |
| 5. | Click on the APU Delivery Bible/APU Delivery Binder/APU Records Library/APU Tech Link. It will open a new window. | |
| 6. | Select the row for which you want to activate read only. Right click on that row and Click on Activate Read Only Option. |  |
How do I add a sub row in Delivery Bible?
| 1. | Login to your account using the username and password provided. | |
| 2. | Hover over the Fleet Management tab and Click on APU Centre Tab. | |
| 3. | Select any row from grid. The row will become highlighted once selected. | |
| 4. | Hover over Current Status drop down. | |
| 5. | Click on the APU Delivery Bible/APU Delivery Binder/APU Records Library/APU Tech Link. It will open a new window. | |
| 6. | Right click on the Row that you wish to Convert to a Header Row and Click on the Convert to Header Row button. | |
| 7. | Once the Row are convert in Header row, Right click on that row and Select the Add Sub Row. |  |
| 8. | If you want to add more than 1 sub rows then please enter the number of rows into text box and press Enter key from the keyboard. |  |
| 9. | Click on SAVE button. | |
Lauren Partridge
Comments