|
Table of Contents : |
How do I Attach/Move documents to Status Entry?
| 1. | Login to your account using the username and password provided. | |
| 2. | Hover over the Fleet Management tab and Click on Propeller Centre Tab. |  |
| 3. | Select the record from the grid. |  |
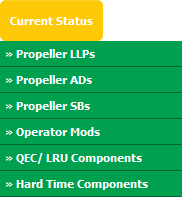
| 4. | Hover over Current Status and Select any tab from dropdown. It will open new window. |  |
| 5. | Click on the SEARCH button. It will open a new window. |  |
| 6. | Insert the required keyword(s). |  |
| 7. | Select any one option from below. 1) Search Current Status Tab (This option will search documents available into Current Status) 2) Search Maintenance History Tab (This option will search documents available into Maintenance History) |
 |
| 8. | Select any one option from below. 1) Containing All words (And) 2) Containing Any word (Or) |
 |
| 9. | Select any one option from below. 1) Containing Exact Words 2) Containing Partial Words |
 |
| 10. | Set Archived Options and Search Category for make more option to make search. |  |
| 11. | Click on the SEARCH button. The results will appear at the bottom of the page. |  |
| 12. | Select documents that you want to attach/move. Note : You can use Shift Key Functionality for selecting multiple document. |
 |
| 13. | Go to Attach/Move To options. It will show you other options. select required details. |  |
| 14. | Click on ATTACH TO STATUS ENTRY button. It will open new window. |  |
| 15. | In new window, you have a list of rows available into grid. Select one or multiple row where you want to attach document. |  |
| 16. | Click on ATTACH button. |  |
| 17. | After clicking on Attach button, If same filename document is already present then it will show a pop-up message. If you still want to continue the Attachment process then click on OK button, then the attach process will be done. |  |
| 18. | It will show a popup message. Click on OK button. |  |
Lauren Partridge
Comments