How do I view the Manage Work Status list in Engine for Invoice Management?
| 1. | Login to your account using your current username and password. | |
| 2. | Click on the Asset / Lease Management Tab. | 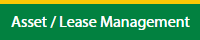 |
| 3. | Click on the Invoice Management tab. | 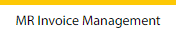 |
| 4. | Select the Engine tab. |  |
| 5. | Hover on the Controls button and click on the Manage Work Status List. It will open in a new window. | 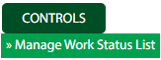 |
| 6. | Select the Client in the dropdown list. |  |
How do I add the Manage Work Status list in Engine for Invoice Management?
| 1. | Login to your account using your current username and password. | |
| 2. | Click on the Asset / Lease Management Tab. | |
| 3. | Click on the Invoice Management tab. | |
| 4. | Select the Engine tab. | |
| 5. | Hover on the Controls button and click on the Manage Work Status List. It will open in a new window. | |
| 6. | Select the Client in the dropdown list. | |
| 7. | Click on the Add button to add the new data. |  |
| 8. | Fill the required details. |  |
| 9. | Click on the Save button. |  |
| 10. | It will open a Popup message. Click on OK. | 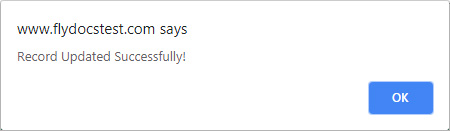 |
How do I edit the Manage Work Status list in Engine for Invoice Management?
| 1. | Login to your account using your current username and password. | |
| 2. | Click on the Asset / Lease Management Tab. | |
| 3. | Click on the Invoice Management tab. | |
| 4. | Select the Engine tab. | |
| 5. | Hover on the Controls button and click on the Manage Work Status List. It will open in a new window. | |
| 6. | Select the Client in the dropdown list. | |
| 7. | Click the asset from the grid which you want to Edit. |  |
| 8. | Click on the Edit button to edit the data. |  |
| 9. | Fill the required details which you want to require. | |
| 10. | Click on the Save button. | |
| 11. | It will open a Popup message. Click on OK. | |
How do I delete the Manage Work Status list in Engine for Invoice Management?
| 1. | Login to your account using your current username and password. | |
| 2. | Click on the Asset / Lease Management Tab. | |
| 3. | Click on the Invoice Management tab. | |
| 4. | Select the Engine tab. | |
| 5. | Hover on the Controls button and click on the Manage Work Status List. It will open in a new window. | |
| 6. | Select the Client in the dropdown list. | |
| 7. | Click the asset from the grid which you want to Edit. | |
| 8. | Click on the Delete button. |  |
| 9. | It will open a Popup message. Click on OK. | 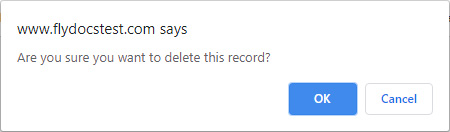 |
| 10. | Another Popup message will be open. Click on OK. | |
How do I reorder Manage Work Status list in Engine for Invoice Management?
| 1. | Login to your account using your current username and password. | |
| 2. | Click on the Asset / Lease Management Tab. | |
| 3. | Click on the Invoice Management tab. | |
| 4. | Select the Engine tab. | |
| 5. | Hover on the Controls button and click on the Manage Work Status List. It will open in a new window. | |
| 6. | Select the Client in the dropdown list. | |
| 7. | Click the asset from the grid which you want to Edit. | |
| 8. | Select the data grid to reorder and click on move Icon to move your row upward/downward. |  |
| 9. | Once you reorder the data it will open a Popup message. Click on OK. | |
How do I view the audit trail of the Manage Work Status list for Invoice Management?
| 1. | Login to your account using your current username and password. | |
| 2. | Click on the Asset / Lease Management Tab. | |
| 3. | Click on the Invoice Management tab. | |
| 4. | Select the Engine tab. | |
| 5. | Hover on the Controls button and click on the Manage Work Status List. It will open in a new window. | |
| 6. | Select the Client in the dropdown list. | |
| 7. | Click on the Audit Trail button. It will open Audit Trail page in a new window. |  |
| 8. | Select filter the fields as per the requirement. |  |
| 9. | Click on the Filter button to filter Audit Trail report. |  |
How do I export audit trail of Manage Work Status list for Invoice Management?
| 1. | Login to your account using your current username and password. | |
| 2. | Click on the Asset / Lease Management Tab. | |
| 3. | Click on the Invoice Management tab. | |
| 4. | Select the Engine tab. | |
| 5. | Hover on the Controls button and click on the Manage Work Status List. It will open in a new window. | |
| 6. | Select the Client in the dropdown list. | |
| 7. | Click on the Audit Trail button. It will open Audit Trail page in a new window. | |
| 8. | Select filter the fields as per the requirement. | |
| 9. | Click on the Filter button to filter the Audit Trail report. | |
| 10. | Click on the Export button, to export the data in your drive. |  |
| 11. | It will show you Popup asking whether you want to open or save the file. |  |
Lauren Partridge
Comments