|
Table of Contents : |
| 1. | Login to your account using the username and password provided. | |
| 2. | Hover over the Commercial Management tab. |  |
| 3. | Hover over Asset Management Centre and Click on Technical Specifications tab. |  |
| 4. | Click on the view icon. It will open a new window. |  |
| 5. | Right click on row which you wish to Edit and select option Edit Row. |  |
| 6. | We can Edit that row by inline option. |  |
| 7. | Click on Save button to Save row data. |  |
| 1. | Login to your account using the username and password provided. | |
| 2. | Hover over the Commercial Management tab. |  |
| 3. | Hover over Asset Management Centre and Click on Technical Specifications tab. |  |
| 4. | Click on the view icon. It will open a new window. |  |
| 5. | Right click on row which you wish to Delete and select option Delete Row. |  |
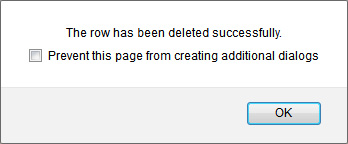
| 6. | It will show you Popup window. Click on OK button. |  |
| 7. | It will show you Popup window. Click on OK button. |  |
| 8. | Then selected row which you have deleted will be marked by line. |  |
How do I add rows above or below?
| 1. | Login to your account using the username and password provided. | |
| 2. | Hover over the Commercial Management tab. |  |
| 3. | Hover over Asset Management Centre and Click on Technical Specifications tab. |  |
| 4. | Click on the view icon. It will open a new window. |  |
| 5. | For creating new row, Right click on the row where you want to add new rows above or below. |  |
| 6. | We can Add Multiple Rows by insert the number of rows here and Enter for set number of rows you want. |  |
| 7. | Fill the Information that you want. |  |
| 8. | Click on SAVE Button to add new rows created by you. |  |
How to convert row to Header row?
| 1. | Login to your account using the username and password provided. | |
| 2. | Hover over the Commercial Management tab. |  |
| 3. | Hover over Asset Management Centre and Click on Technical Specifications tab. |  |
| 4. | Click on the view icon. It will open a new window. |  |
| 5. | Right click on the Row you wish to Convert to a Header Row and Click on the Convert to Header Row button. |  |
How to convert Header row to Standard row?
| 1. | Login to your account using the username and password provided. | |
| 2. | Hover over the Commercial Management tab. |  |
| 3. | Hover over Asset Management Centre and Click on Technical Specifications tab. |  |
| 4. | Click on the view icon. It will open a new window. |  |
| 5. | Right click on the Header Row that you wish to Convert to a Standard Row and Click on the Convert to Standard Row button. |  |
| 1. | Login to your account using the username and password provided. | |
| 2. | Hover over the Commercial Management tab. |  |
| 3. | Hover over Asset Management Centre and Click on Technical Specifications tab. |  |
| 4. | Click on the view icon. It will open a new window. |  |
| 5. | Right Click on the row you wish to Manage the Hyperlink for. It will open new window. |  |
| 6. | Select Yes from drop-down and other relevant details. |  |
| 7. | Click on Save button to Save row data. |  |
| 1. | Login to your account using the username and password provided. | |
| 2. | Hover over the Commercial Management tab. |  |
| 3. | Hover over Asset Management Centre and Click on Technical Specifications tab. |  |
| 4. | Click on the view icon. It will open a new window. |  |
| 5. | Select the row for which you want to activate read only. Right click on that row and Click on Activate Read Only Option. |  |
|
Note:- If you do not see this option appear it is due to access restrictions for your user account. please contact an administrator. |
Lauren Partridge
Comments