|
Table of Contents : |
| 1. | Login to your account using the username and password provided. | |
| 2. | Hover over the Commercial Management tab then Hover over Asset Management Centre and Click on Technical Specifications tab. |  |
| 3. | Hover over the CONTROLS dropdown and Click on the Manage Export Profiles option. It will open a new window. |  |
| 4. | Select Client from the list and Select Template Name from the list. It will load data into grid. |  |
| 5. | Go to Export Profile Template list and Click on the Enter Text option. |  |
| 6. | It will show you Textbox. Enter title that you want to give for Export Profile and Click on the Save icon. |  |
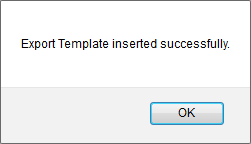
| 7. | It will show you Popup window. Click on the OK button. |  |
How do I enable row for default Export?
| 1. | Login to your account using the username and password provided. | |
| 2. | Hover over the Commercial Management tab then Hover over Asset Management Centre and Click on Technical Specifications tab. |  |
| 3. | Hover over the CONTROLS dropdown and Click on the Manage Export Profiles option. It will open a new window. |  |
| 4. | Select Client from the list and Select Template Name from the list. |  |
| 5. | Go to Export Profile Template from the list. It will load data into grid. |  |
| 6. | Select record from the grid that you want to edit. |  |
| 7. | Click on the EDIT button. |  |
| 8. | Go to Row that you want to enable for export then Go to Enable Row for default Export column and Tick the tick box. |  |
| 9. | Click on The SAVE button. |  |
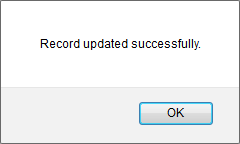
| 10. | It will show you Popup window. Click on the OK button. |  |
How do I disable row for default Export?
| 1. | Login to your account using the username and password provided. | |
| 2. | Hover over the Commercial Management tab then Hover over Asset Management Centre and Click on Technical Specifications tab. |  |
| 3. | Hover over the CONTROLS dropdown and Click on the Manage Export Profiles option. It will open a new window. |  |
| 4. | Select Client from the list and Select Template Name from the list. |  |
| 5. | Go to Export Profile Template from the list. It will load data into grid. |  |
| 6. | Select record from the grid that you want to edit. |  |
| 7. | Click on the EDIT button. |  |
| 8. | Go to Row that you want to disable for export then Go to Enable Row for default Export column and Untick the tick box. |  |
| 9. | Click on The SAVE button. |  |
| 10. | It will show you Popup window. Click on the OK button. |  |
| 1. | Login to your account using the username and password provided. | |
| 2. | Hover over the Commercial Management tab then Hover over Asset Management Centre and Click on Technical Specifications tab. |  |
| 3. | Hover over the CONTROLS dropdown and Click on the Manage Export Profiles option. It will open a new window. |  |
| 4. | Click on AUDIT TRAIL button. It will open Audit Trail in a new window. |  |
| 5. | Select filter types to filter Audit Trail Report. Like filter by keyword, filter by operations, filter by date, filter by client etc. |  |
| 6. | Click on FILTER button to filter Audit Trail report. It will show filtered data into grid. |  |
| 1. | Login to your account using the username and password provided. | |
| 2. | Hover over the Commercial Management tab then Hover over Asset Management Centre and Click on Technical Specifications tab. |  |
| 3. | Hover over the CONTROLS dropdown and Click on the Manage Export Profiles option. It will open a new window. |  |
| 4. | Click on AUDIT TRAIL button. It will open Audit Trail in a new window. |  |
| 5. | Select filter types to filter Audit Trail Report. Like filter by keyword, filter by operations, filter by date, filter by client etc. |  |
| 6. | Click on Export button. |  |
| 7. | It will show you Popup asking whether you want to open or save file. |  |
Lauren Partridge
Comments