|
Table of Contents : |
How do I add new group while uploading a document?
| 1. | Login to your account using the username and password provided. | |
| 2. | Hover over the Fleet Management tab. |  |
| 3. | Hover over the Maintenance Control Centre tab and Click on the Manage By Date tab. |  |
| 4. | Select any Centre tab that you want to open like Aircraft Centre, Engine Centre, etc. |  |
| 5. | Select any Document Type that is visible to you like Miscellaneous, etc. |  |
| 6. | Select Client from list. It will load listing records into grid by default. |  |
| 7. | Select Audit View from the list. It will load records into grid. | 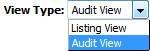 |
| 8. | Select the date from the grid that you want to access and Click on the view icon. It will open a new window. (E.g. As shown in the screenshot 26th March 2018 date record is selected). | 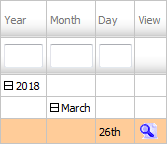 |
| 9. | Click on the button 'UPLOAD DOCUMENTS'. Selecting this button will open a popup window. |  |
| 10. | Select 'Add Group' option from the list. | 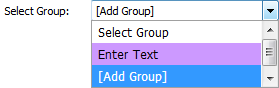 |
| 11. | Select Upload Options. | 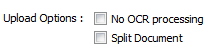 |
| 12. | Click on the green icon to access your computer and then select the required files. Use the CTRL key on your keyboard to select multiple files - up to 50 can be selected per upload! Note: Each file must be below 20MB. |
 |
| 13. | Locate your multiple documents from Inventory. It will show you documents and a new box shown against each documents, Enter Group name that you want to keep for that document into text box. | 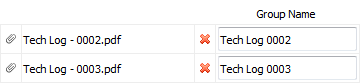 |
| 14. | After selecting the required files, click the 'UPLOAD' button to begin the upload process. |  |
| 15. | It will show you Popup window. Click on the OK button. | 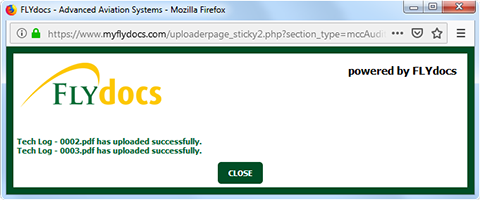 |
|
Note:- If you do not see this option appear it is due to access restrictions for your user account. please contact an administrator. |
Lauren Partridge
Comments