| 1. | Login to your account using the username and password provided. | |
| 2. | Hover over the Fleet Management tab and Click on Aircraft Centre Tab. |  |
| 3. | Select any aircraft for which you want to add a row to LAL. |  |
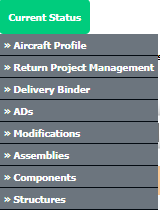
| 4. | Hover over Current Status and Select any tab from dropdown. It will open new window. |  |
| 5. | Click on the view icon for required row (located on the right hand side of the grid). |  |
| 6. | Click on the UPLOAD DOCUMENTS button. Selecting this button will open a popup window. |  |
| 7. | Select the Group from the dropdown (Document Type) of which the new document are associated too. |  |
| 8. | Click on the green icon to access your computer and then select the required files. Use the CTRL key on your keyboard to select multiple files - up to 50 can be selected per upload! Note: Each file must be below 40MB. |
 |
| 9. | After selecting the required files, click the UPLOAD button to begin the upload process. |  |
| 10. | Now, hover over the Maintenance Status button and Click on the Maintenance History button. It will open new window. NOTE: The Maintenance Status button will become active once an aircraft record has been selected. |
 |
| 11. | Select Box View. |  |
| 12. | Click on SHOW button. It will load respective view into grid. |  |
| 13. | Click on the Open Folder Icon. It will open new Window. Here user can view current status Client upload Documents. Note: User cannot "Move / Copy Folder" or "Delete Box / Folder". |
 |
Lauren Partridge
Comments