| 1. | Login to your account using the username and password provided. | |
| 2. | Hover over the Commercial Management tab. |  |
| 3. | Hover over the Asset Management Centre tab and Click on the Mid-term Inspections tab. |  |
| 4. | Click on the view icon. It will open a new window. |  |
| 5. | Click on the view icon where Check List column shows value as a 'Yes'. It will open new window. | 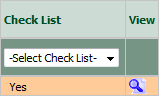 |
| 6. | Select row from grid. Right click on selected row and click on Edit row option. | 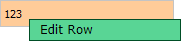 |
| 7. | Click on Save button to Save row data. |  |
| 1. | Login to your account using the username and password provided. | |
| 2. | Hover over the Commercial Management tab. | |
| 3. | Hover over the Asset Management Centre tab and Click on the Mid-term Inspections tab. | |
| 4. | Click on the view icon. It will open a new window. | |
| 5. | Click on the view icon where Check List column shows value as a 'Yes'. It will open new window. | |
| 6. | Select row from grid. Right click on selected row and click on Delete row option. | 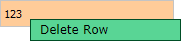 |
| 7. | It will open pop up. Click on OK to delete Row. | 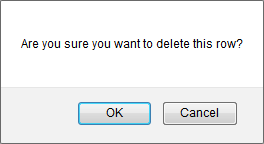 |
| 1. | Login to your account using the username and password provided. | |
| 2. | Hover over the Commercial Management tab. | |
| 3. | Hover over the Asset Management Centre tab and Click on the Mid-term Inspections tab. | |
| 4. | Click on the view icon. It will open a new window. | |
| 5. | Click on the view icon where Check List column shows value as a 'Yes'. It will open new window. | |
| 6. | Select row from grid. Right click on selected row and click on Add row above option. It will open new window. | 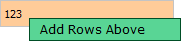 |
| 7. | Please Insert The Number of Rows that you want to add. Note: If the number of rows is more than 1, please press ENTER to generate the rows on the page. |
 |
| 8. | It will load rows into grid. Fill the required details. |  |
| 9. | Click on Save button to Save row data. |  |
| 1. | Login to your account using the username and password provided. | |
| 2. | Hover over the Commercial Management tab. | |
| 3. | Hover over the Asset Management Centre tab and Click on the Mid-term Inspections tab. | |
| 4. | Click on the view icon. It will open a new window. | |
| 5. | Click on the view icon where Check List column shows value as a 'Yes'. It will open new window. | |
| 6. | Select row from grid. Right click on selected row and click on Add Row below option. | 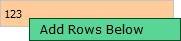 |
| 7. | Please Insert The Number of Rows that you want to add. Note: If the number of rows is more than 1, please press ENTER to generate the rows on the page. |
|
| 8. | It will load rows into grid. Fill the required details. | |
| 9. | Click on Save button to Save row data. | |
How to convert row to Header row?
| 1. | Login to your account using the username and password provided. | |
| 2. | Hover over the Commercial Management tab. | |
| 3. | Hover over the Asset Management Centre tab and Click on the Mid-term Inspections tab. | |
| 4. | Click on the view icon. It will open a new window. | |
| 5. | Click on the view icon where Check List column shows value as a 'Yes'. It will open new window. | |
| 6. | Select row from grid. Right click on selected row and click on Convert to Header row. It will convert your Standard row to Header row. | 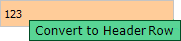 |
How to convert Header row to Standard row?
| 1. | Login to your account using the username and password provided. | |
| 2. | Hover over the Commercial Management tab. | |
| 3. | Hover over the Asset Management Centre tab and Click on the Mid-term Inspections tab. | |
| 4. | Click on the view icon. It will open a new window. | |
| 5. | Click on the view icon where Check List column shows value as a 'Yes'. It will open new window. | |
| 6. | Select Header row from the grid. Right click on selected Header row and click on Convert to Standard Header row. It will convert your Header row to Standard row. | 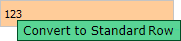 |
How do I select rows to hyperlink with Maintenance History?
| 1. | Login to your account using the username and password provided. | |
| 2. | Hover over the Commercial Management tab. | |
| 3. | Hover over the Asset Management Centre tab and Click on the Mid-term Inspections tab. | |
| 4. | Click on the view icon. It will open a new window. | |
| 5. | Click on the view icon where Check List column shows value as a 'Yes'. It will open new window. | |
| 6. | Select row from grid. Right click on selected row and click on Manage Hyperlink option. | 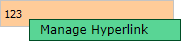 |
| 7. | Select Hyperlink option value to Yes from List then Select Maintenance History from the list and Select other relevant details. It will load data into grid. |  |
| 8. | Tick the tick box shown into grid and select record which you want to use as a hyperlink. | 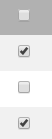 |
| 9. | Click on the SAVE button. | |
| 10. | It will show you pop up message. Click on OK button. |  |
How do I select rows to hyperlink with Current Status?
| 1. | Login to your account using the username and password provided. | |
| 2. | Hover over the Commercial Management tab. | |
| 3. | Hover over the Asset Management Centre tab and Click on the Mid-term Inspections tab. | |
| 4. | Click on the view icon. It will open a new window. | |
| 5. | Click on the view icon where Check List column shows value as a 'Yes'. It will open new window. | |
| 6. | Select row from grid. Right click on selected row and click on Manage Hyperlink option. | |
| 7. | Select Hyperlink option value to Yes from List then Select Current Status from the list and Select other relevant details. It will load data into grid. |  |
| 8. | Tick the tick box shown into grid and select record which you want to use as a hyperlink. | 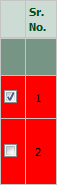 |
| 9. | Click on the SAVE button. | |
| 1. | Login to your account using the username and password provided. | |
| 2. | Hover over the Commercial Management tab. | |
| 3. | Hover over the Asset Management Centre tab and Click on the Mid-term Inspections tab. | |
| 4. | Click on the view icon. It will open a new window. | |
| 5. | Click on the view icon where Check List column shows value as a 'Yes'. It will open new window. | |
| 6. | Select row from grid. Right click on selected row and click on Activate Read Only option. It will make you your row read only. | 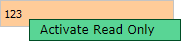 |
| 7. | It will show you pop up message. Click on OK button. |  |
How do I Deactivate Read Only?
| 1. | Login to your account using the username and password provided. | |
| 2. | Hover over the Commercial Management tab. | |
| 3. | Hover over the Asset Management Centre tab and Click on the Mid-term Inspections tab. | |
| 4. | Click on the view icon. It will open a new window. | |
| 5. | Click on the view icon where Check List column shows value as a 'Yes'. It will open new window. | |
| 6. | Select row from grid. Right click on selected row and click on Deactivate Read Only option. It will make you your row read only. | 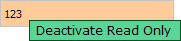 |
| 7. | It will show you Pop up message. Click on OK button. |  |
Lauren Partridge
Comments