How do I manage Listing rows in Workpacks/ Work Orders?
How do I edit row?
| 1. |
Login to your account using the username and password provided. |
|
| 2. |
Hover over the Fleet Management tab. |
 |
| 3. |
Hover over the Maintenance Control Centre tab and Click on the Manage By Date tab. |
 |
| 4. |
Select any Centre tab that you want to open like Aircraft Centre, Engine Centre, etc. |
 |
| 5. |
Select any Document Type that is visible to you like Workpacks/ Work Orders, etc. |
 |
| 6. |
Select Client from list. It will load listing records into grid by default. |
 |
| 7. |
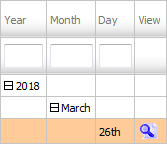
Go to end of the date record from grid that you want to access and Click on the view icon. It will open a new window. (E.g As shown in image 26th March 2018 date record is selected.) |
 |
| 8. |
Once new window is open, Go to end of the record that you want to access and Click on the view icon. It will open a new window. |
 |
| 9. |
Select row from grid. Right click on selected row and click on Edit row option. |
 |
| 10. |
Click on SAVE button to Save row data. |
 |
How do I delete row?
| 1. |
Login to your account using the username and password provided. |
|
| 2. |
Hover over the Fleet Management tab. |
|
| 3. |
Hover over the Maintenance Control Centre tab and Click on the Manage By Date tab. |
|
| 4. |
Select any Centre tab that you want to open like Aircraft Centre, Engine Centre, etc. |
|
| 5. |
Select any Document Type that is visible to you like Workpacks/ Work Orders, etc. |
|
| 6. |
Select Client from list. It will load listing records into grid by default. |
|
| 7. |
Go to end of the date record from grid that you want to access and Click on the view icon. It will open a new window. (E.g As shown in image 26th March 2018 date record is selected.) |
|
| 8. |
Once new window is open, Go to end of the record that you want to access and Click on the view icon. It will open a new window. |
|
| 9. |
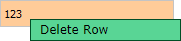
Select row from grid. Right click on selected row and click on Delete row option. |
 |
| 10. |
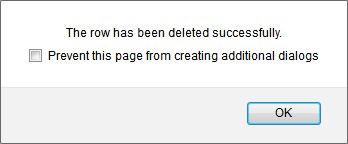
It will open pop up. Click on OK to delete Row. |
 |
| 11. |
It will open pop up. Click on OK to delete Row. |
 |
| 12. |
Then selected row which you have deleted will be marked by line. |
 |
How do I add rows above?
| 1. |
Login to your account using the username and password provided. |
|
| 2. |
Hover over the Fleet Management tab. |
|
| 3. |
Hover over the Maintenance Control Centre tab and Click on the Manage By Date tab. |
|
| 4. |
Select any Centre tab that you want to open like Aircraft Centre, Engine Centre, etc. |
|
| 5. |
Select any Document Type that is visible to you like Workpacks/ Work Orders, etc. |
|
| 6. |
Select Client from list. It will load listing records into grid by default. |
|
| 7. |
Go to end of the date record from grid that you want to access and Click on the view icon. It will open a new window. (E.g As shown in image 26th March 2018 date record is selected.) |
|
| 8. |
Once new window is open, Go to end of the record that you want to access and Click on the view icon. It will open a new window. |
|
| 9. |
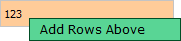
Select row from grid. Right click on selected row and click on Add row above option. It will open new window. |
 |
| 10. |
Please Insert The Number of Rows that you want to add.
Note: If the number of rows is more than 1, please press ENTER to generate the rows on the page. |
 |
| 11. |
It will load rows into grid. Fill the required details. |
 |
| 12. |
Click on SAVE button to Save row data. |
 |
How do I add rows below?
| 1. |
Login to your account using the username and password provided. |
|
| 2. |
Hover over the Fleet Management tab. |
|
| 3. |
Hover over the Maintenance Control Centre tab and Click on the Manage By Date tab. |
|
| 4. |
Select any Centre tab that you want to open like Aircraft Centre, Engine Centre, etc. |
|
| 5. |
Select any Document Type that is visible to you like Workpacks/ Work Orders, etc. |
|
| 6. |
Select Client from list. It will load listing records into grid by default. |
|
| 7. |
Go to end of the date record from grid that you want to access and Click on the view icon. It will open a new window. (E.g As shown in image 26th March 2018 date record is selected.) |
|
| 8. |
Once new window is open, Go to end of the record that you want to access and Click on the view icon. It will open a new window. |
|
| 9. |
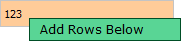
Select row from grid. Right click on selected row and click on Add Row below option. |
 |
| 10. |
Please Insert The Number of Rows that you want to add.
Note: If the number of rows is more than 1, please press ENTER to generate the rows on the page. |
|
| 11. |
It will load rows into grid. Fill the required details. |
|
| 12. |
Click on SAVE button to Save row data. |
|
How do I delete a cell?
| 1. |
Login to your account using the username and password provided. |
|
| 2. |
Hover over the Fleet Management tab. |
|
| 3. |
Hover over the Maintenance Control Centre tab and Click on the Manage By Date tab. |
|
| 4. |
Select any Centre tab that you want to open like Aircraft Centre, Engine Centre, etc. |
|
| 5. |
Select any Document Type that is visible to you like Workpacks/ Work Orders, etc. |
|
| 6. |
Select Client from list. It will load listing records into grid by default. |
|
| 7. |
Go to end of the date record from grid that you want to access and Click on the view icon. It will open a new window. (E.g As shown in image 26th March 2018 date record is selected.) |
|
| 8. |
Once new window is open, Go to end of the record that you want to access and Click on the view icon. It will open a new window. |
|
| 9. |
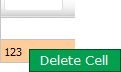
Right click on cell which you wish to Delete and select option Delete Cell. |
 |
| 10. |
Popup message will appear to confirm deletion. By selecting OK button, The Cell will be deleted. |
 |
| 11. |
It will show you Popup message. Click on OK button. |
 |
Note:- If you do not see this option appear it is due to access restrictions for your user account. please contact an administrator.
|
Lauren Partridge
Comments