|
Table of Contents : |
| 1. | Login to your account using the username and password provided. | |
| 2. | Hover over the Fleet Management tab. Hover Over Document management Centre tab and Select Manage Internal documentation tab. |  |
| 3. | Select Client and Other relevant details. |  |
| 4. | Click VIEW button. It will open new window. |  |
| 5. | Hover over the CONTROLS dropdown and Click on the CSV Management option. It will open a new window. |  |
| 6. | Select upload option. | 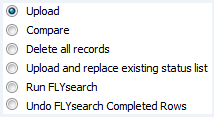 |
| 7. | Select the file to upload. |  |
| 8. | Click on UPLOAD button. |  |
| 9. | It will show you columns selected in the grid. Click on CONTINUE button. |  |
How do I use the compare feature in CSV Management?
| 1. | Login to your account using the username and password provided. | |
| 2. | Hover over the Fleet Management tab. Hover Over Document management Centre tab and Select Manage Internal documentation tab. |  |
| 3. | Select Client and Other relevant details. |  |
| 4. | Click VIEW button. It will open new window. |  |
| 5. | Hover over the CONTROLS dropdown and Click on the CSV Management option. It will open a new window. |  |
| 6. | Select Compare option. | 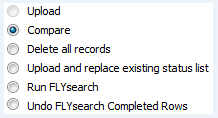 |
| 7. | Select Columns that you want to compare by ticking tick box. |  |
| 8. | Select the file to upload |  |
| 9. | Click on UPLOAD button. |  |
| 10. | It will show you columns selected for comparison in the grid. Click on CONTINUE button. |  |
| 11. | Click on DOWNLOAD REPORT button. |  |
| 12. | It will ask you to view or save Excel sheet. This Excel sheet will show you compared information. |  |
How do I use delete all records in CSV management?
| 1. | Login to your account using the username and password provided. | |
| 2. | Hover over the Fleet Management tab. Hover Over Document management Centre tab and Select Manage Internal documentation tab. |  |
| 3. | Select Client and Other relevant details. |  |
| 4. | Click VIEW button. It will open new window. |  |
| 5. | Hover over the CONTROLS dropdown and Click on the CSV Management option. It will open a new window. |  |
| 6. | Select Delete all records option. | 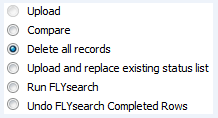 |
| 7. | Click on DELETE button. |  |
| 8. | Popup window will be shown. Click on the OK button. | 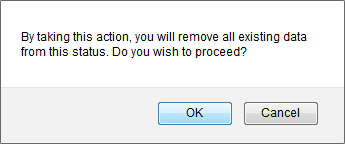 |
| 9. | It will show you "Rows deleted successfully." message. |  |
How do I use upload and replace existing status list?
| 1. | Login to your account using the username and password provided. | |
| 2. | Hover over the Fleet Management tab. Hover Over Document management Centre tab and Select Manage Internal documentation tab. |  |
| 3. | Select Client and Other relevant details. |  |
| 4. | Click VIEW button. It will open new window. |  |
| 5. | Hover over the CONTROLS dropdown and Click on the CSV Management option. It will open a new window. |  |
| 6. | Select Upload and replace existing status list option. | 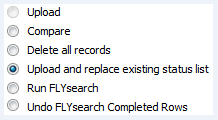 |
| 7. | Select file that you want to upload. |  |
| 8. | Click on UPLOAD button. |  |
| 9. | Popup window will be shown. Click on the OK button. |  |
| 10. | Popup window will be shown. Click on the OK button. | 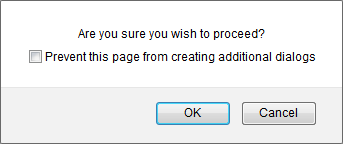 |
| 11. | It will show you columns selected for comparison in the grid. Click on CONTINUE button. |  |
| 12. | Click on DOWNLOAD REPORT button. |  |
| 13. | It will ask you to view or save Excel sheet. |  |
| 1. | Login to your account using the username and password provided. | |
| 2. | Hover over the Fleet Management tab. Hover Over Document management Centre tab and Select Manage Internal documentation tab. |  |
| 3. | Select Client and Other relevant details. |  |
| 4. | Click VIEW button. It will open new window. |  |
| 5. | Hover over the CONTROLS dropdown and Click on the CSV Management option. It will open a new window. |  |
| 6. | Select Run FLYsearch. | 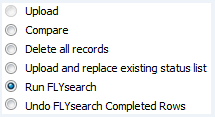 |
| 7. | Select Run FLYsearch option. |  |
| 8. | It will show you Popup window. Click on the OK button. Note: Work status comes based on the Master » FLYsearch Management. |
 |
| 9. | FLYsearch will now automatically begin to find and populate documentation. An email notification will be sent once completed. |  |
How do I undo most recent FLYsearch?
| 1. | Login to your account using the username and password provided. | |
| 2. | Hover over the Fleet Management tab. Hover Over Document management Centre tab and Select Manage Internal documentation tab. |  |
| 3. | Select Client and Other relevant details. |  |
| 4. | Click VIEW button. It will open new window. |  |
| 5. | Hover over the CONTROLS dropdown and Click on the CSV Management option. It will open a new window. |  |
| 6. | Select Undo FLYsearch Completed Rows option. | 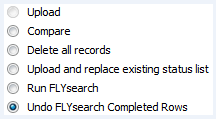 |
| 7. | Click on UN-DO FLYSEARCH button. |  |
| 8. | It will show you message of an email notification will be sent once process of Undo FLYsearch completed. |  |
| Note:- If you do not see this option appear it is due to access restrictions for your user account. please contact an administrator. |
Lauren Partridge
Comments